Showing posts with label wet blending. Show all posts

Friday, August 30, 2013

Attack of the Owlbears!

GenCon 2013 has come and gone and now it's time to get back to the commissions waiting on my desk.  I've got a wait list until mid-September, so I've got a lot of great projects to show you in the weeks to come!  Let's take a look at a project for Jon H. over at Black Blade Publishing.  I met Jon at KantCon 2013 and after he saw my display models he was excited to get a trio of his owlbears painted to showcase quality.


The task was to do arctic themed owlbears.  I didn't want a bland or overwhelming polar-white look, so I went with German Grey shadows to white highlights.  Subtle wet-blending on the models made a great shade gradient that I'm really pleased with.  The bases were adorned with a few twigs and rocks and then topped off with Secret Weapon's snow (crushed glass & realistic water).  I like the wet snow effect a lot, but for a purely arctic feel, with fluffy snow drifts, I think something like Techstar's snow might be a better bet for a pure white look.  The Techstar stuff uses micro blown white bubbles instead of glass to achieve its effect (both are hazardous and protective masks, gloves, and eyewear should be worn).


The Reaper owlbears have a great and rabid look to their movement.  They also have huge, dilated eyes, perfect to show off irises, light dots, and bloodshot veins.  Each iris is orange mixed with light brown, with yellow/light brown flecks, highlighted with pure lemon yellow.  A dot of light grey flanked by white makes the light dots, and a thin trail of blood red was used to make the veins.


The upraised feet of the owlbears has snow clinging them as if they've been truly tromping through the drifts.


There's a lot of area to build gradients across the model for some wonderful variation, even for such a simple grey/white coat.


This one has a darker aspect, with deeper rings around the eyes and harder shadows on the belly and under its wings.


I took away a new found appreciation for heavy shadows after GenCon and viewing the winning entries.  At the showcase level of paint quality (4-6 hours a model), monster models with a few colors are especially great for doing this effect while under a strict time budget.


That's it for these owlbears and the Monster Lab for this week, come back next time and check out the elf Pyromancer I've been working on and more!

Sunday, September 11, 2011

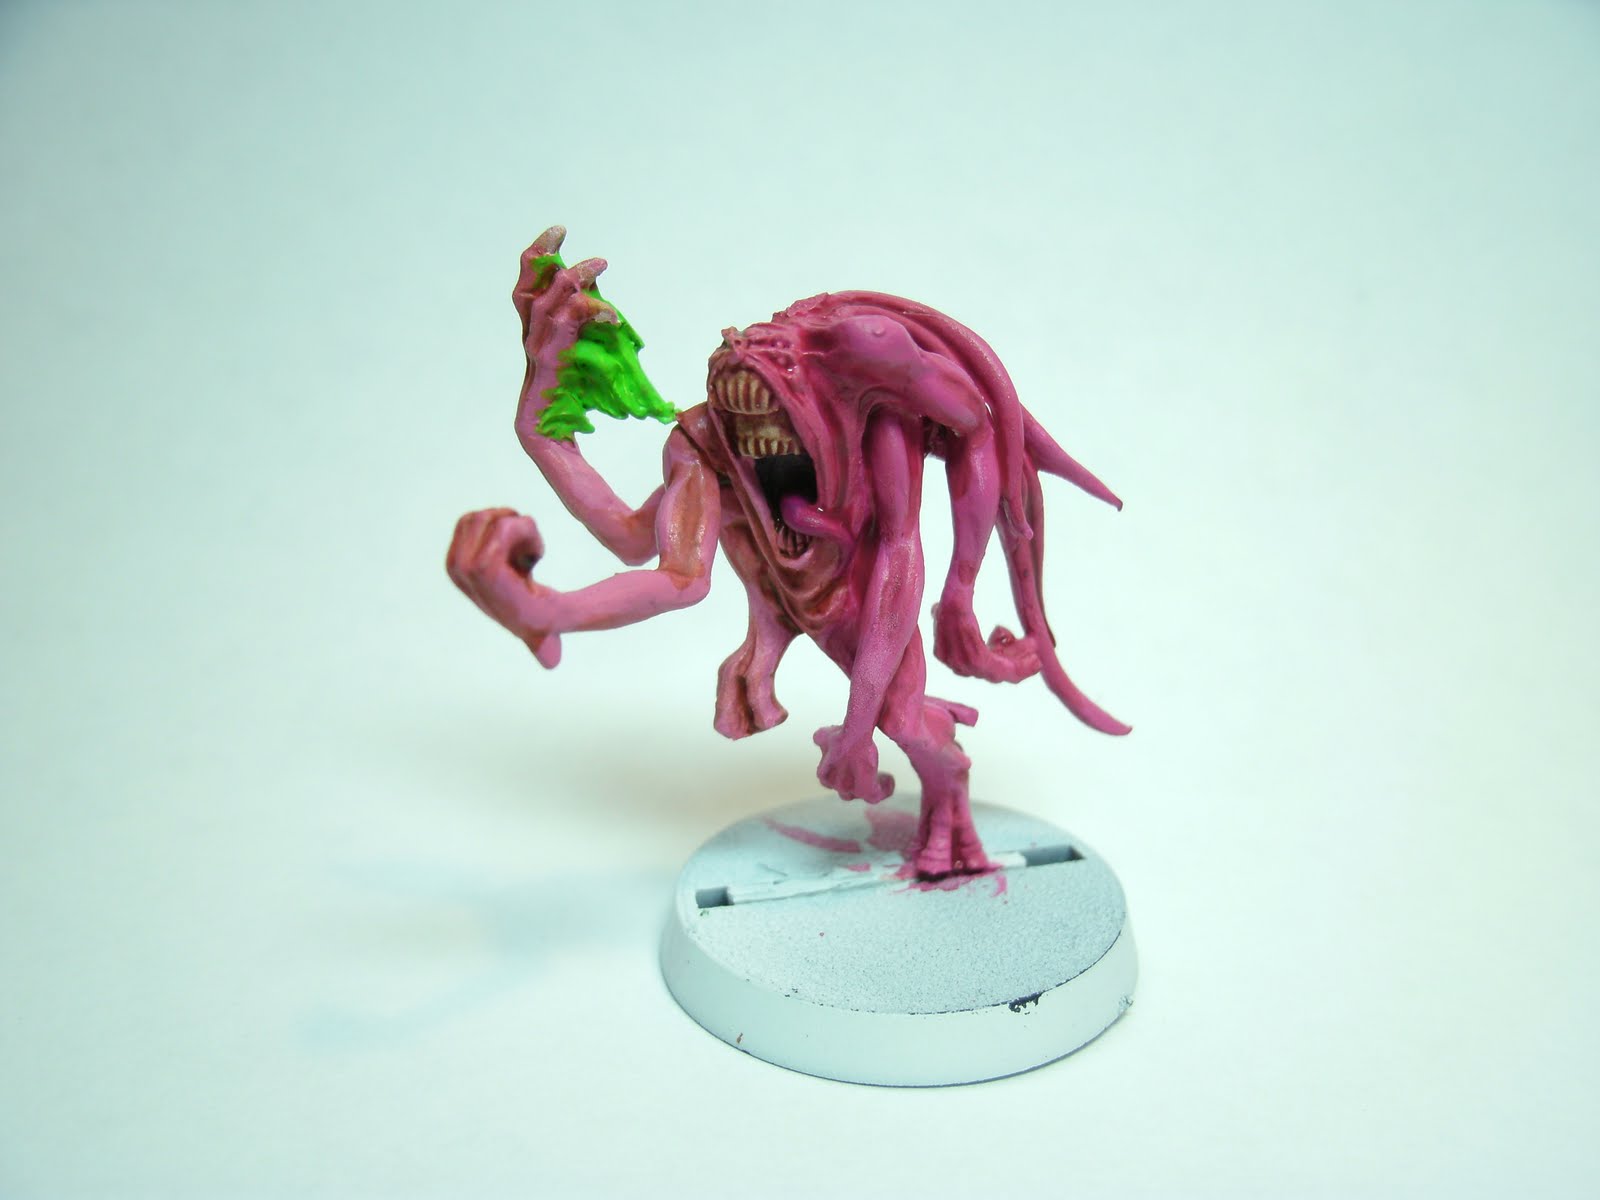
Wet Palette Workshop: Pink Horrors

Back in August I did a piece on how to make your own wet palette. In that post I focused on the principles of using a wet palette and some of it simple concepts. Switching from dry painting to wet blending is a huge step forward for anyone's hobby, but it also comes with its own list of complications as well as benefits.

In this post I'll take you through a step-by-step of how to take a model (in this case a pink horror) from prime coat to the table. I'll also address some of the bumps-in-the-road you may encounter from using this technique and little tips to help you paint smarter.


To get started let's go over our checklist: painting mat (in my case an exacto cutting board), wet palette, mixing brush (to blend paints on palette, I use an old standard dry brush), basing brush, fine detail brush, paints, water, towel/napkin, good lighting source (I prefer a fluorescent desk lamp for a bright, clean, white light), and a cup of your favorite caffeinated beverage (mine's green tea with lemon).

Begin by cleaning your model of extra flash or mold lines (I miss them sometimes in my excitement to get painting) and apply a primer coat. For many projects that are flesh or lighter colors I choose white primer to keep the colors bright. When it comes to large scale models with lots of recesses, shadowing or armor plating I prefer black. In this case we'll use white for the pink horror.


This particular pink horror is going to have two primary base colors, magenta and pink. Using a wet palette will allow us to seamlessly blend the two colors together to give the effect that the horror is shifting color. If you are uncomfortable painting two side-by-side bases apply the following steps, but with only one base.

To achieve the magenta base we make a 1:1 blend of Warlock Purple and Bleached Bone. To do this pour out a drop of paint from your pot that is about the size of the tip of a pencil eraser. Pour the warlock and bone onto the wet palette side by side, take your mixing brush and gently swirl the two colors together. Take care not to push too hard as you may rupture the waxed paper palette surface if you do. Also, mix the paints together and spread them onto the palette so that a thin layer of paint covers the palette's surface, too much paint in one area won't benefit from the palette's wet property.

For the second base, mix a 1:1:1 blend of warlock, bone, and Elf Flesh. Apply both bases in thin even coats, completely covering the primer coat. Because we're using a wet palette the paints should apply smoothly, without clumps. If you paints are too watery, clean your brush, dip it back into the paletted paint and gently wipe it on your cleaning surface to remove excess moisture. If this problem persists, leave your palette exposed for a few minutes, this should dry the paints slightly.


You may be thinking that that is a lot of instruction just to put a couple of base coats on a model. It is, but the main focus of this post is to not only show how to wet blend, wash, and base, but to also talk about the thought processes and the philosophy of the techniques. By doing so you should gain perspective and not just replicate the process, but understand how it really works. You can get a "1,2,3 guide" anywhere, we'll strive to go a little deeper than that. Let's continue.

With the body base coats complete, let's move on to detail base coats. At this stage you want to base anything that could run a risk of smudging its paint onto further higher coats on the body of the mini as you continue painting. The flame is a good example of this, and so is the inside of the mouth and tongue. Paint anything now that is in deep recess (mouth) or contains a broad surface (flame).

To do the inside of the mouth mix a tiny amount of Chaos Black to the edge of you magenta mixture. For the tongue, a straight warlock base should do nicely.

To give the flame a fire effect we'll base it with its lightest shade first, then add darker shades to the raised portions (this gives the effect of intense heat/energy at the flame source and diminishing heat as it radiates out). Base the flame Scorpion Green.


With the primary bases done, its time to add recess shadowing and depth. For the lighter pink side apply a Gryphonne Sepia wash into the skin folds, grooves, and areas between appendages. You don't need to cover the whole model, just the recesses.

For the darker, magenta side mix a 1:1 of warlock and sepia and paint it in as the previous wash. The wash mixture may need a tiny amount of water added to bring it to wash consistency, use moderation in this case.

Related Posts Plugin for WordPress, Blogger...