Monday, September 26, 2011

Lost in the Warp: Found Pictures


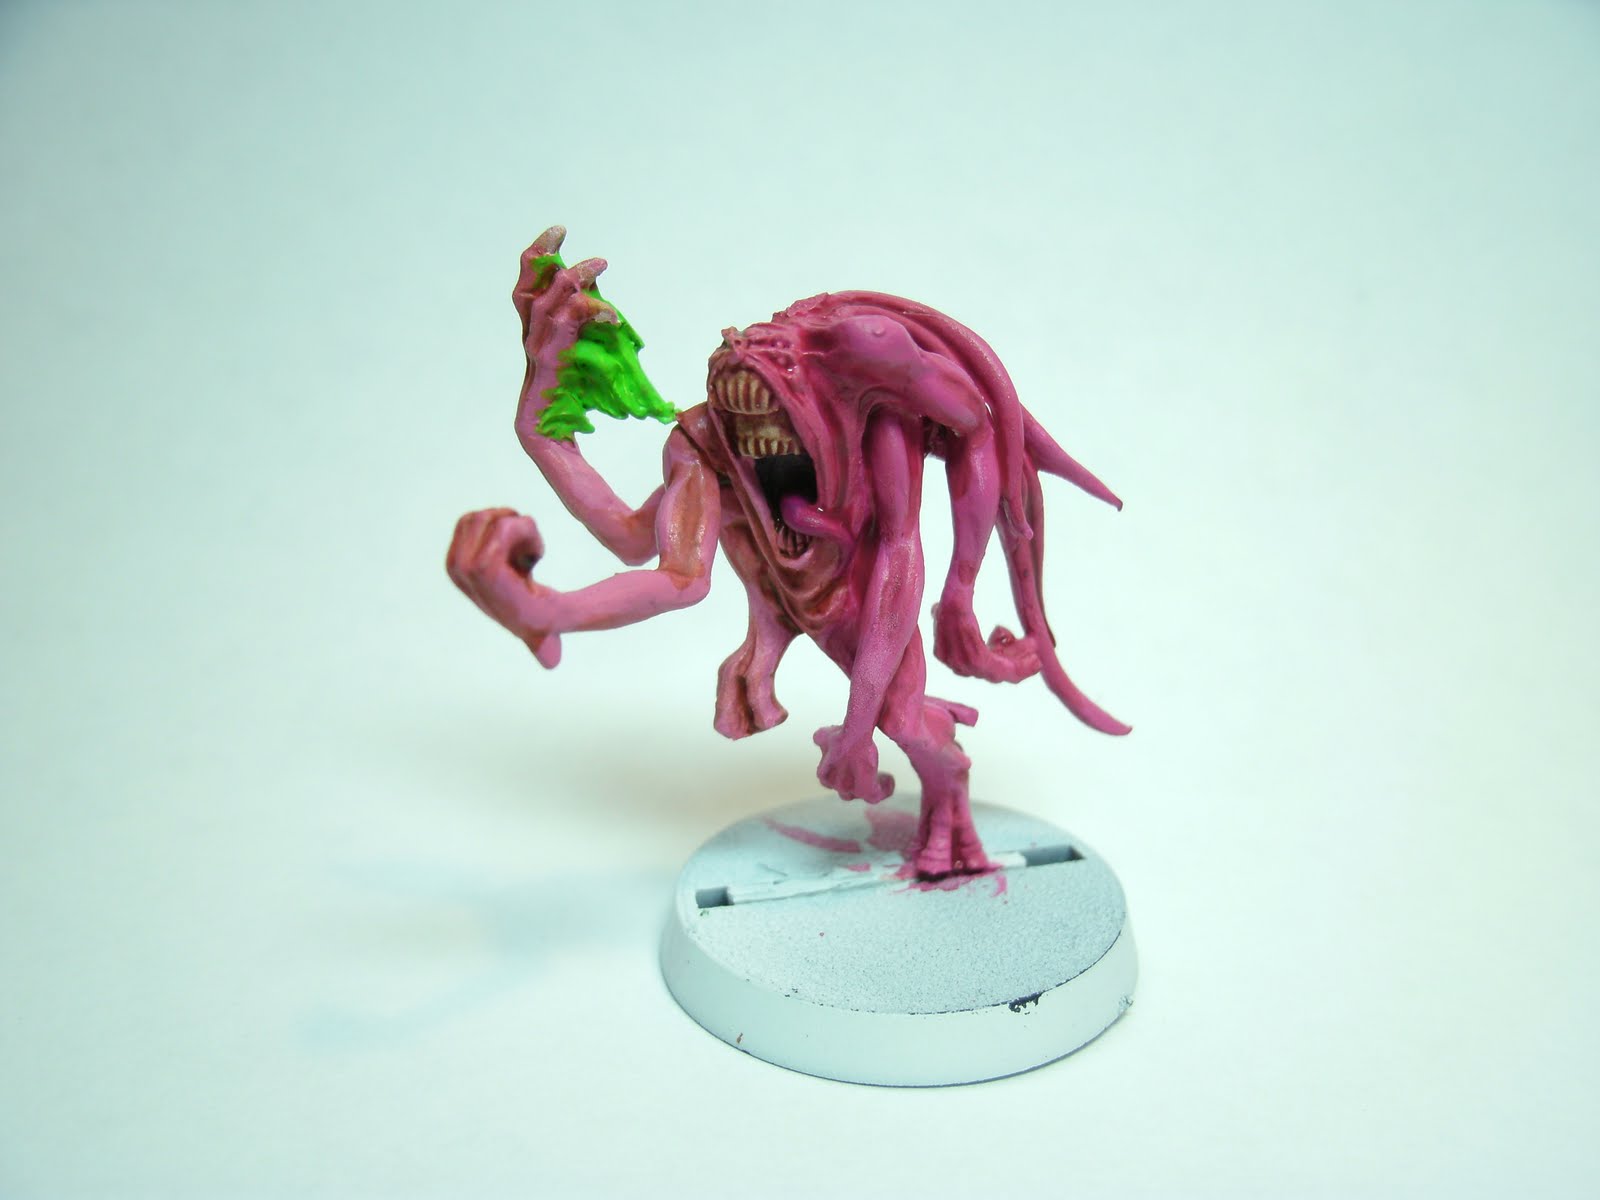
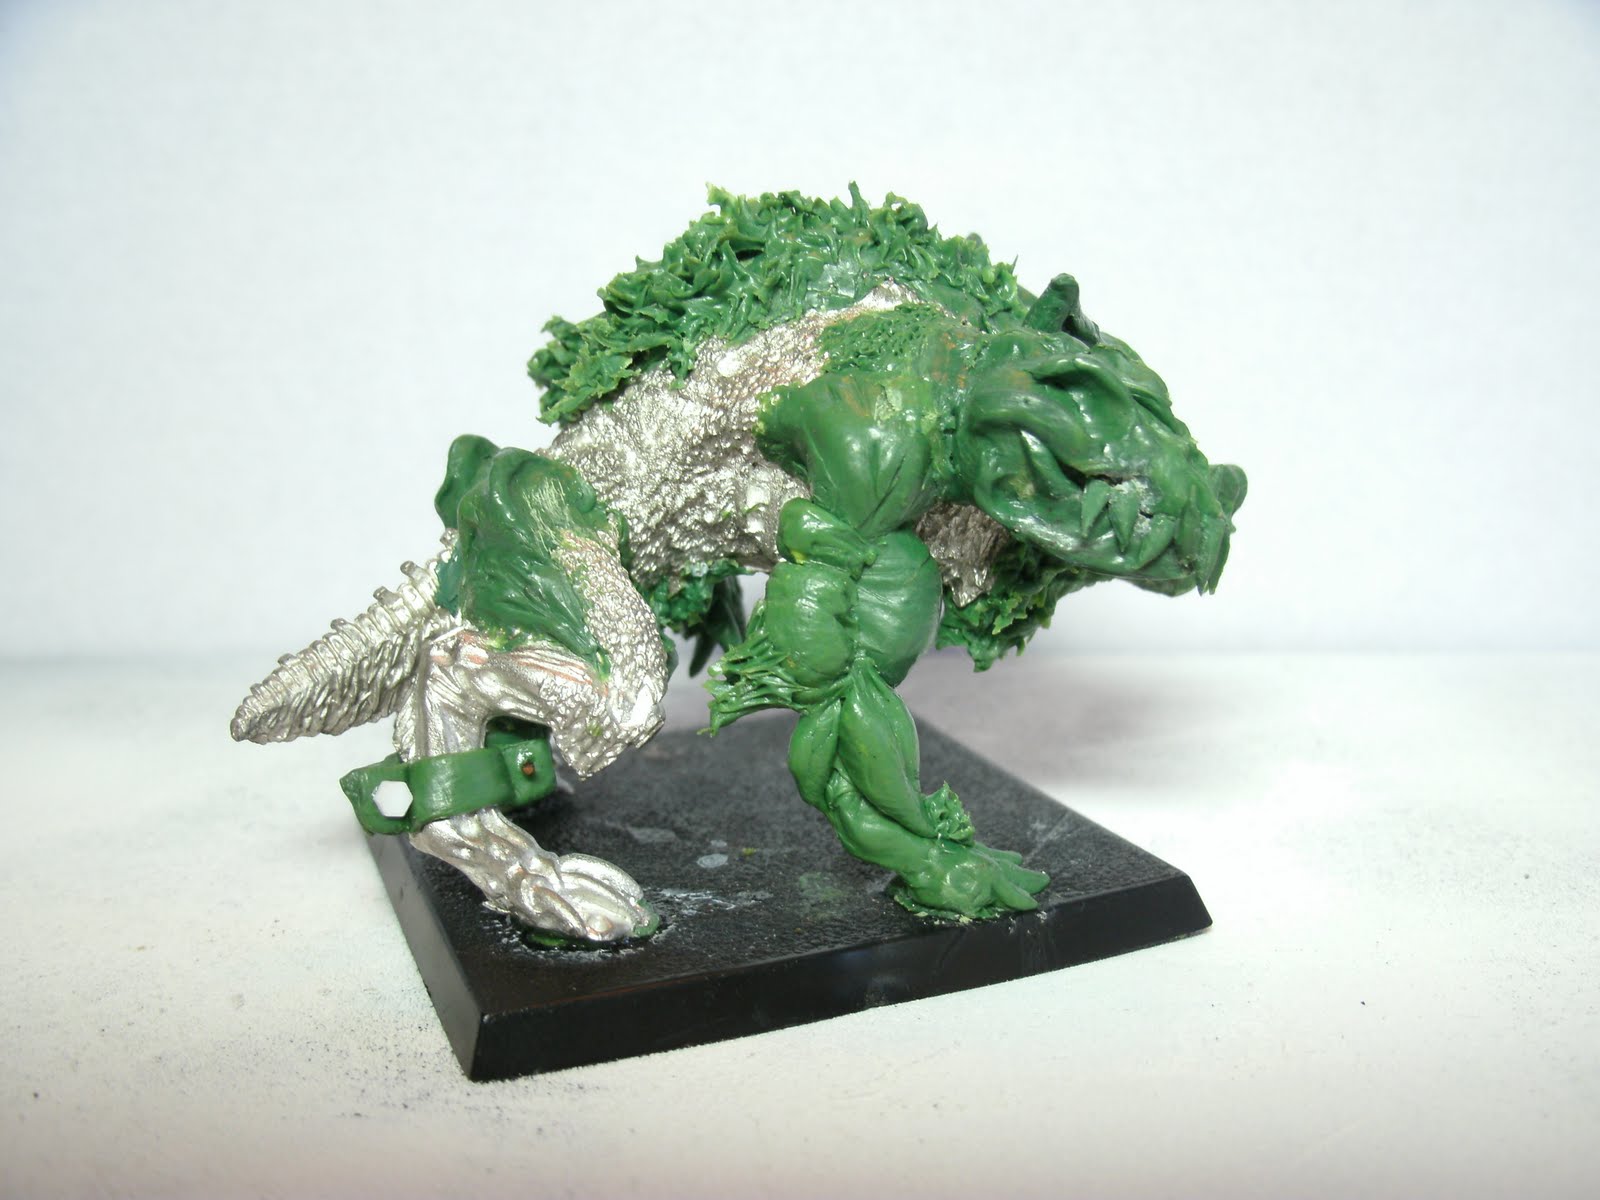
Drifting amongst the pernicious winds of the immaterium (that's the way I like to think of the internet) a number of lost pictures have been recently reclaimed from its murky depths. Ok, so maybe finding a few lost pics isn't that dramatic, but hey, I like to think of my email inbox as a particularly cluttered corner of the warp. In the "drafts" folder of my gmail account I stumbled upon an email that was never sent, and lo and behold, it held the pics of my grotesques as greenies!


I built all three from the ground up, using paperclip frames and layering on a rough foundation of green stuff before adding layers of green stuff musculature. GW Talos/Cronos bitz were used to accent the pieces and give them a uniquely Dark Eldar look.


These pictures were taken immediately after I finished sculpting the three grotesques back in July. It was my original plan to enter the three as a squad submission for the 2011 Chicago Golden Demon competition. However, I only had two weeks from the time these pictures were taken to get them finished, and somewhat bittersweet, I abandoned that project to complete what became a runner up in the diorama category for the year's GD.


The finished diorama in all its violent glory.


The idea to do a battle-scene with Tau Fire Warriors and a Grotesque came from the initial plan to use fire warriors as scenic casualties in the squad entry. With the squad nixed I knew that Tau would be the perfect adversary for the diorama!


A critique I got from James Craig, Phil Kelly (I think it was him judging), and others was that the basing needed higher levels of detail and highlights. I couldn't agree more. The entirety of the basing, from blank wood to finish, took the last 24 hours I had before my plane flight to Chicago on Friday. James stated that, "the models look more painted than the basing, and the basing looks more realistic than the models." I felt humbled simply to be receiving advice from a multiple GD winner. It was an awesome experience.


I wanted to give a strong feel of action to the scene, hence the crawling Tau and the one getting slashed. The slashed Tau is caught off balance, about to be launched bodily through the air, after receiving a particularly grievous wound to the chest. The blood flecking his armor and the surrounding rocks gives the impression that his death is a messy one. I have to admit, I was a bit conservative with the blood splatter and gore... I didn't want to mess up my GD entry at the eleventh hour because I got too gore happy!


The whole thing was an awesome experience that was months in the making. I had a blast in Chicago hanging out at Games Day and getting to meet some of the best painters in the business. It truly is a satisfying experience to take a concept out of the depths of your imagination to the reality of the table top.


Sunday, September 11, 2011

Wet Palette Workshop: Pink Horrors

Back in August I did a piece on how to make your own wet palette. In that post I focused on the principles of using a wet palette and some of it simple concepts. Switching from dry painting to wet blending is a huge step forward for anyone's hobby, but it also comes with its own list of complications as well as benefits.

In this post I'll take you through a step-by-step of how to take a model (in this case a pink horror) from prime coat to the table. I'll also address some of the bumps-in-the-road you may encounter from using this technique and little tips to help you paint smarter.


To get started let's go over our checklist: painting mat (in my case an exacto cutting board), wet palette, mixing brush (to blend paints on palette, I use an old standard dry brush), basing brush, fine detail brush, paints, water, towel/napkin, good lighting source (I prefer a fluorescent desk lamp for a bright, clean, white light), and a cup of your favorite caffeinated beverage (mine's green tea with lemon).

Begin by cleaning your model of extra flash or mold lines (I miss them sometimes in my excitement to get painting) and apply a primer coat. For many projects that are flesh or lighter colors I choose white primer to keep the colors bright. When it comes to large scale models with lots of recesses, shadowing or armor plating I prefer black. In this case we'll use white for the pink horror.


This particular pink horror is going to have two primary base colors, magenta and pink. Using a wet palette will allow us to seamlessly blend the two colors together to give the effect that the horror is shifting color. If you are uncomfortable painting two side-by-side bases apply the following steps, but with only one base.

To achieve the magenta base we make a 1:1 blend of Warlock Purple and Bleached Bone. To do this pour out a drop of paint from your pot that is about the size of the tip of a pencil eraser. Pour the warlock and bone onto the wet palette side by side, take your mixing brush and gently swirl the two colors together. Take care not to push too hard as you may rupture the waxed paper palette surface if you do. Also, mix the paints together and spread them onto the palette so that a thin layer of paint covers the palette's surface, too much paint in one area won't benefit from the palette's wet property.

For the second base, mix a 1:1:1 blend of warlock, bone, and Elf Flesh. Apply both bases in thin even coats, completely covering the primer coat. Because we're using a wet palette the paints should apply smoothly, without clumps. If you paints are too watery, clean your brush, dip it back into the paletted paint and gently wipe it on your cleaning surface to remove excess moisture. If this problem persists, leave your palette exposed for a few minutes, this should dry the paints slightly.


You may be thinking that that is a lot of instruction just to put a couple of base coats on a model. It is, but the main focus of this post is to not only show how to wet blend, wash, and base, but to also talk about the thought processes and the philosophy of the techniques. By doing so you should gain perspective and not just replicate the process, but understand how it really works. You can get a "1,2,3 guide" anywhere, we'll strive to go a little deeper than that. Let's continue.

With the body base coats complete, let's move on to detail base coats. At this stage you want to base anything that could run a risk of smudging its paint onto further higher coats on the body of the mini as you continue painting. The flame is a good example of this, and so is the inside of the mouth and tongue. Paint anything now that is in deep recess (mouth) or contains a broad surface (flame).

To do the inside of the mouth mix a tiny amount of Chaos Black to the edge of you magenta mixture. For the tongue, a straight warlock base should do nicely.

To give the flame a fire effect we'll base it with its lightest shade first, then add darker shades to the raised portions (this gives the effect of intense heat/energy at the flame source and diminishing heat as it radiates out). Base the flame Scorpion Green.


With the primary bases done, its time to add recess shadowing and depth. For the lighter pink side apply a Gryphonne Sepia wash into the skin folds, grooves, and areas between appendages. You don't need to cover the whole model, just the recesses.

For the darker, magenta side mix a 1:1 of warlock and sepia and paint it in as the previous wash. The wash mixture may need a tiny amount of water added to bring it to wash consistency, use moderation in this case.

Sunday, September 4, 2011

Vampire Counts Modeling Showcase


A few years ago I struck upon the idea to do a Tilean themed Vampire Counts army. For those who are familiar with Tilea in the Warhammer world, it is a province in the south of Old World, just north of Nehekhara. As the geography suggests and the fiction (Tilea is described as a collection of warring city states like renaissance Italy) Tilea is an homage to Italy/Greece. The chance to model an army that would resemble the legions of the Greek underworld was an opportunity I couldn't pass up!

The premise of the army is that Hades (vampire lord) is leading the undead legions from Tilea and he is bolstered by army book units that have been modeled to resemble characters from Greek mythology (i.e. a black coach is modeled as the Boatman of the River Styx). Here's a few of the models I have done so far.


Hades is going to be a baddie vampire thoroughly decked out and riding around on some bad-a mount. However, he needs back up from some more subtle spell casters.


Here is one such necromancer, in this case Hypnos, the Greek mythological embodiment of sleep. I used the empire wizard plastic boxed kit as the basis for this model while adding some green stuff details. The enormous hood he is wearing is great because it gives him a drowzy feel. In juxtaposition to that, there is an added degree of motion as he is intoning some incantation from his tome. His idea of "sleep" obviously a bit self-serving, in that he is raising the restless dead.


Hypnos' counterpart is Thanatos, the embodiment of death. For Thanatos I once again used the Empire Wizard kit as his base. I wanted to give Thanatos a equally shrouded feel, but this time kept the hood to a smaller size and focused embellishments on the cowl he is pulling up in front of his face.. very Nosferatu-esque. Another touch was a wiry "Greek" beard, modeled to resemble those found on Ancient Greek statuary. The last bit of conversion work was to add a vulture from the Giant boxed set on his shoulder.


At the inception of my army I decided to include a unit of Dire Wolves. My idea was to have their squad leader be Cerberus, the guardian to the gates of the underworld.


For this particular model I used three different Reaper Miniature wolves. Two heads were severed from their bodies and then glued onto the central wolf's body.


The "skull head" was made from a similar head as the other two, but I used an exacto-knife to file off its details until it resembled a skull. To have a standard on which to base my carvings I googled 'wolf skull' and used a picture for reference.


The initial idea was to have Cerberus as the leader of the Dire Wolf pack, but..


I decided later to up the ante and convert Cerberus off the Varghulf frame and use him as such.


The details for the Cerberus were done in many layers. First, I hacked off the front half of the Varghulf with an exacto. Next, I bent two sections of paper clip to make a frame for each of the new front arms. I applied a rough layer of green stuff to the paper clip to bulk it out slightly and add stability. With that done I made nubs for the basis of the heads and applied the foundation for the back ridge. With the foundation pieces dry, I started on a multi-step process of adding layers of green stuff to make the head details and arm details. The arms were easiest as they were either balls of green stuff (bicep/tricep muscles) or chords (forearm muscles).

This is a pretty quick explanation, but I plan to have a step-by-step in depth how-to for complex musculature modeling later!


The last bit of detail for the model will be the remnants of a chain attached to the brace around its ankle.


What Greek themed undead army would be complete without an undead cyclops? Just such a model was converted up to represent the cyclops Polyphemus, who Odysseus and his men so rudely abused when they ate his sheep and then proceeded to poked out his eye. I wanted to capture Polyphemus some time after he had his eye put out and died, wandering blindly around his island home. To do this I modeled a central closed eye and a decaying jawline that is agape and looks as if howling. His hand is raised near his head to give the effect of him sheltering his battered eye as he cringes in his throes of pain.


A number of his bracers were carved off and replaced with green stuff sheep skins. Note the ram head skull on his arm. Little affectations were given to make him the "real" Polyphemus, who lived off of his livestock and the land. Besides gaping wounds and rotting flesh, the other really characterful conversion was the modeling of his club, the very olive tree trunk which was used to poke out his eye!


This is just the start to the modelling that I have in store for my Vampire Counts army. Future work in progresses include: The Boatman of the River Styx (Black Coach), Hoplite infantry (Grave Guard), Undead centaurs (Black Knights/Blood Knights), Siren (Banshee), and Harpies (Giant Bats).


Related Posts Plugin for WordPress, Blogger...