Showing posts with label Haradel. Show all posts

Monday, November 19, 2012

Showcase: Arsmouth Freeband

Another commission is in the books and I have a new batch of Freeblades minis to show off!  Here they are!


This muster archer is painted wearing a menagerie of peasant greens, browns, and greys, having either spontaneously joined the freeband to protect his farm or because a heavy handed magistrate ordered his conscription.


All musters have an armband with the county colors they are privateering for, in this case the sky blue of Arsmouth.

A custom arrow, made from Formula P3 super thin .5mm brass pin and thin-sheet plasticard completes the muster's bow and arrow ensemble.


A more formally equipped member of the freeband is the militiaman, who shares uniform tabard, tunic, coif, shield, and bracers with his fellows.


To date, I've done three Arsmouth militia spearmen for Jon, so this time I wanted to add some visual variety to the group by posing this one in a crouched stance.  


Check out his left eye, it's been lamed when he suffered a slash down his face where he still has the scar to prove it!


I've begun transitioning to a non-metallic metal schemes on most pieces, in this commission the only metallic areas were the chain mail coifs on the the spearmen.


A couple of months ago I received a very special commission that included two unreleased models for the freeblades system.  It was a incredibly cool experience being the first anywhere to put paint to a brand new model and I feel especially honored to have had the opportunity.  Well, one of those models became my absolute favorite from the range and this apprentice knight of Vidnuar is directly inspired by it.  I'm looking forward to posting pics of those two yet to be released models when they are ready to make their debut!


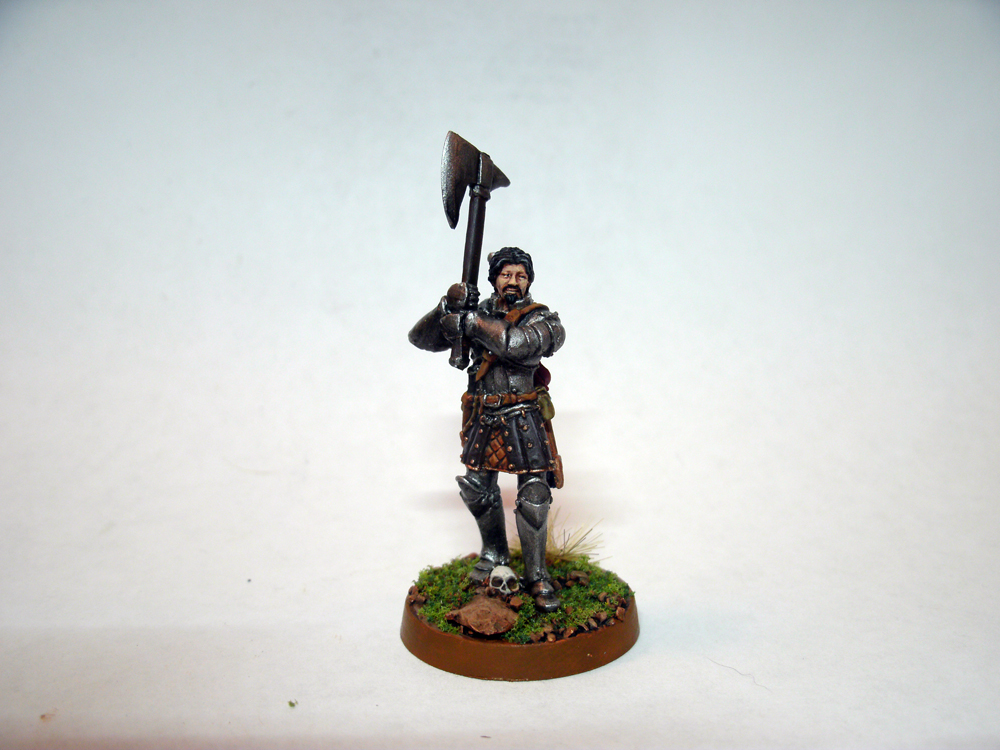
This apprentice knight really keys off on my efforts to transition to NNM painting styles.  Not one drop of metallic paint was used him and in the end it really lends to a clean look with crisp lines.  


This model is a variant on the apprentice knight of Barek with the only difference being his greatsword and lack of goatee, so I was set to task adding differentiation between the two.  The skull between the knight's feet was removed and his trailing leg was bent back to give him a striding pose and increase his dynamism a bit.  The addition of a ponytail and fluttering ribbon are both nudges pushing him towards the pretty-boy look of those who follow Vidnuar the lion/leadership aspect.


I'm glad Jon appreciated the subtle touches that were the graying hair and lamb's wool vest on this muster thresher.  He may be old, but not so old he won't bludgeon you with his flail!


I had a lot of fun painting up this Vekul, and took the opportunity to do a snow basing for the first time.  I used GW's snow effects, and was reasonably satisfied... until the basing completely dried.  Admittedly I was using their old snow product (I'm unsure if it has changed since it received new packaging), but the use of long "string" pieces as snowflakes instead of powder is not what I'm looking for.  Think "a giant woolly beast just shed" instead of "yay, it just snowed!" and you'll get the picture.  For future projects I might try Snow Tex, but am undecided, any suggestions?


Thanks for stopping by the Lab and checking out my latest work, come by next week to see the completed chaos soul Grinder models I started on last week and later on down the road a Ghetorix/Warp Wolf conversion for Hordes!

Happy hobbying!

Monday, October 29, 2012

What's on My Desk: Adding Green Stuff Flair & Making a Convert

This week we're taking a look at what's on my desk and revisiting the fantasy realms of Freeblades and Ravnica!  This week is also a return to commission work for me, as I have spent the last seven days kicking back and... hobbying, on my own model for a change.  

In my last post I spent some time detailing the progress I have been making on Kairos, Fateweaver and his exploits on the table top.  He was a ton of work, and after what seemed an eternity of basing, washing, highlighting, rebasing, rewashing, and more highlighting, he's finally done!  Next week I'll be showing him off in all his chaos glory in a hobby showcase!  (The chaos manifestations on his base are a favorite, both goofy and creepy!)

But like I said, this week Kairos will have to wait.  We're headed off to the counties of Haradel to add flavor to some stock minis with the simple addition of green stuff modeling epoxy.


First on my desk is a Haradelan militia spearman.  I've done this model before for my long-time client Jon C and wanted to give him something different.  Taking a look at the model I noticed that his feet/legs could easily be bent into a crouching position.  A quick cut to his forward leg and the insertion of a bent pin and his forward foot was reattached.  For a lot of projects I've used Gale Force 9's brass pinning set, but for this one I used Privateer Press's Formula P3 pins because they are more pliable.  The P3 line also has a selection of super fine pins that are great for fine pinning jobs like resin and small parts/hands/weapons.


With the pin secured and bent to shape I applied a base layer of green stuff to flesh out the leg, giving me a shaped surface to work on.


Allowing that to dry ~30-40 minutes I put another layer on top, one that would give the militia man's pants their final shape.  I used the narrow spade tool from the GF9 modeling tool set, another item I picked up from my local store 31st Century Games & Hobbies. (If you are in the area, I highly recommend that you stop in, the owner Joe is in 6 days a week, is open to midnight and is a super nice guy).


Leaving the leg to dry overnight I finished up by adding a strip of green stuff to act as a hem for the MM's tabard and another strip sculpted to clean up the top of his boot.


A few simple steps later and Jon's next MM will be in a defensive crouch, ready to take on a an oncoming charge or launch a devastating thrust up under an opponent's guard!


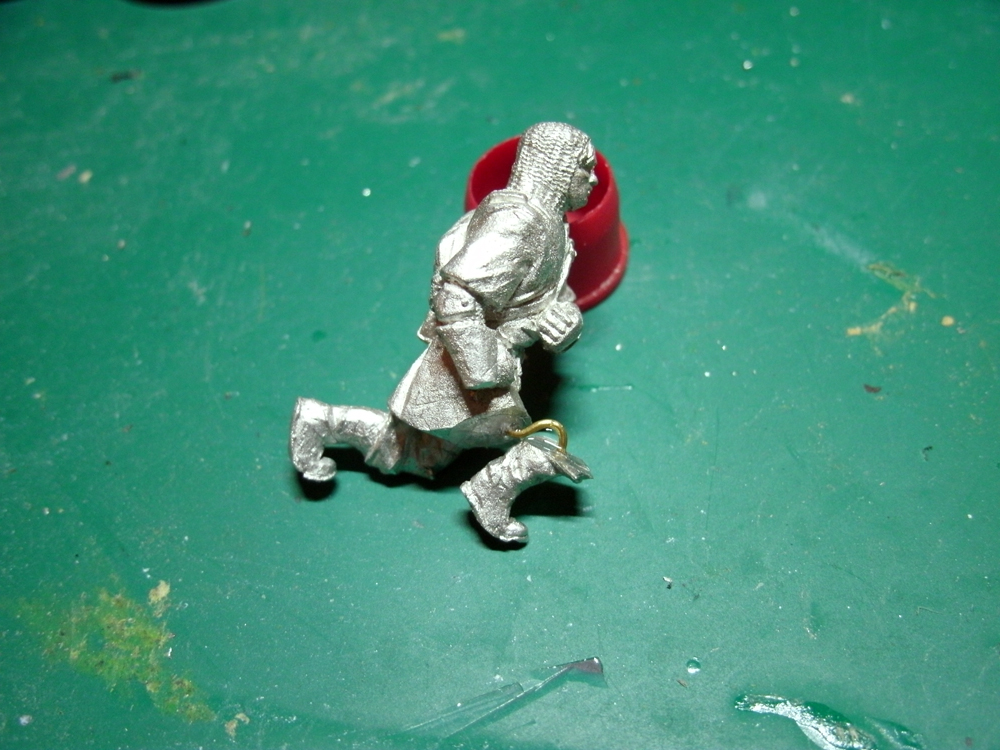
Another model making a repeat appearance on my desk is this apprentice knight.  Last time I did an apprentice knight of Barek (boar aspect).  This week's model is an adaptation of that model (minus the goatee and swapping a claymore for the battle axe) and is an apprentice knight if Vidunar (lion aspect).  Since the models are so similar I wanted to do a few things that would set them apart in Jon's collection.  First I cut out the skull between the knight's feet and bent back his rear leg giving him a striding posture.  Next I grabbed a length of green stuff and sculpted him a ponytail.  The last additions (not added yet) will be some lengths of ribbon draped about his claymore and arms and a string to tie back his hair.


A model making its way onto my desk for the first time is this Vekul snow beast.  The model is pretty basic (a big hairy hominid) with a very yeti-like posture.  Abominable snowmen always seem to be a tad on the creepy "I'm gonna grab ya" side and this guy fits that perfectly.  To dress the model up a bit I felt like he could use some variation to his smooth body hair.  Additions of course hair to his knees, groin, chest, shoulders, head, and back give the model a bit more body and protect the portions of his person that would be most vulnerable to the cold.


I've been hard at work on hobby projects, but I've also been busy slinging spells across the table as well.  On many a Friday night I head over to 31st Century to participate in their weekly Magic: the Gathering tournament.  Playing cards is a nice way for me to get a few hours of gaming in before or after hobbying with little or no prep needed, play a few hands and its back to the hobby desk.  It's also nice to have a low investment activity that I can still nerd out with that doesn't involve models and breaks up the routine.


Anyhow, my card playing status ratcheted up a notch this last Saturday when I won the Return to Ravnica Gamesday event held at 31st with my white/black/green token aggro deck.  Among the prizes I walked away with was this spiffy playmat featuring a Nivix Guildmage from the Izzet Guild.  I'm an avid enthusiast of illustrative art, especially fantasy illustrations, and the art on this piece is absolutely stunning.

Which brings us to the last part of this week's title.  When I started playing cards to take a break from hobby I promised myself I wouldn't play with a playmat (how unnecessary!).  But after winning this bad boy I think I'm going to be a convert to the cause and sport my playmate proudly when I sit down to sling some spells!


That's all for this week and what's on my desk, come back next time and I PROMISE (I know I promised it would be this week) that I will show off pics of the completed Kairos, Fateweaver!

Happy hobbying!


Friday, September 28, 2012

Showcase: Haradel Questers

This week we've got a two-for, last week's what's on my desk and this week's showcase.  Both features are pics of a recent commission I finished for the Freeblades game system and one of my best customers Jon C.  I was set to task to paint a Haradel freeband and one one giant, called a Golat.  Let's take a look.


For this guy I wanted to highlight his lifestyle as a scavenger and plunderer.  His armor and clothing are made partly of pieces he's taken off his adversaries.  If you look closely his left pauldron contains the same green and white check pattern as that I painted on a knight for Jon a few weeks ago.  And again on his skirt, there are the colors of the Haradel band I painted this week, the light and dark blues of Arsmouth County.  To finish off the look I kept all the metallics on the model dull and forgoing layers of highlight and instead washed them with Agrax Earthshade to give them a rusty undertone.  A speckling of Mournfang Brown and highlighted with Skrag Brown completed the rust effect.  The verdigris on the brass was achieved with a layer of Hawk Turquoise highlighted with a 1:1 mix of HT and white.


As is befitting of many a good knightly band the group is filled out with a healthy meat-shield of peasants.  The Muster Thresher is one such noble soul, wearing his tattered garb and not a bit of armor this guy is ready to give his life for his betters (or so the Haradelan aristocracy would like to think so).


Not all questing knights are of the imitated class, this is an apprentice of Barek.


The High Questor leads the Haradelan freeband proudly wearing the color of his county Arsmouth.


Another peasant support unit is this Thresher archer.  Right away I noticed that this model would be a perfect a pefect homage to one of my all time favorite video game characters, can you guess which one?


Like many a fantasy knightly caste, the Haradelans have a warrior-priest.  This guy is called a "Fist of Vidunar."  A few freehand touches really helped to fill the wide blank areas on his cloak and tabard and furthered the priestly motif.


As for the what's on my desk portion of this week's post, it's eyes, eyes, eyes!


Each time I paint a commission or a piece for my personal collection, the eyes are always a part of the model I pay especial attention to.  In my opinion they're a feature that can really make or break a finished model.  Do them wrong and it sets the whole thing off, do them right and you can elevate a model to hobbying greatness.


Doing eyes is easier than you think, and possibly a less precise science as well.  When I paint an eye I start by creating the white.  Ok, that's a no brainer, but what may not be is that I often overshoot the boundaries and paint outside the lines.  I don't do this on purpose, but I don't fret over it either.  When painting eyes remember this, it doesn't have to be perfect until the end.  This is what I mean, after the whites I'll paint an iris.  Once again if I go outside the bounds of the eye it's not big deal, the key here is only overextend onto the eyelids, not the rest of the whites.  After that a point of black and you're almost done.  Maybe you did fudge while painting the whites, irises or pupils, or maybe even all of them.  This is all you need to do at the end to clean up: take the darker layer of skin tone and hit the eye lids and then again with a lighter shade, viola, they're perfect!

The reason why I go into such detail and am adamant about this is that lots of people try to get the eyes they do perfect with the first brush stroke and are disappointed when they don't.  They don't want to go back and touch up.  The key to any good paint job is touching up after the fact, often it's not perfect the first time!


That's it for this week, stop by again!

Related Posts Plugin for WordPress, Blogger...