
This week I've got a lot on my desk! I'm converting a Haradel Questing Knight and adding some modeling umph to a few Grular Lifetaker models by fabricating arrows for them to shoot from their bows. To finish off this week's post I'm also going to have a sneak peek teaser of two future releases from DGS miniatures!
Without further ado, let's take a look at what's on my desk this week.

I'm back to working hard for Jon C, lead rules designer of DGS's game system Freeblades, on a few models for his personal collection. Jon sent me a questing knight of Tahnar with instructions to spruce him up. He described the model as being dedicated to the raven aspect of Haradelan mythology. "A raven feather cloak would be great," he said and so I decided to do that and add a few other accent pieces to bulk out the model. In the end I centered my attentions around three things, his shield, helmet, and the cloak I was to fabricate. Let's take a look where I started and I'll detail the construction process.

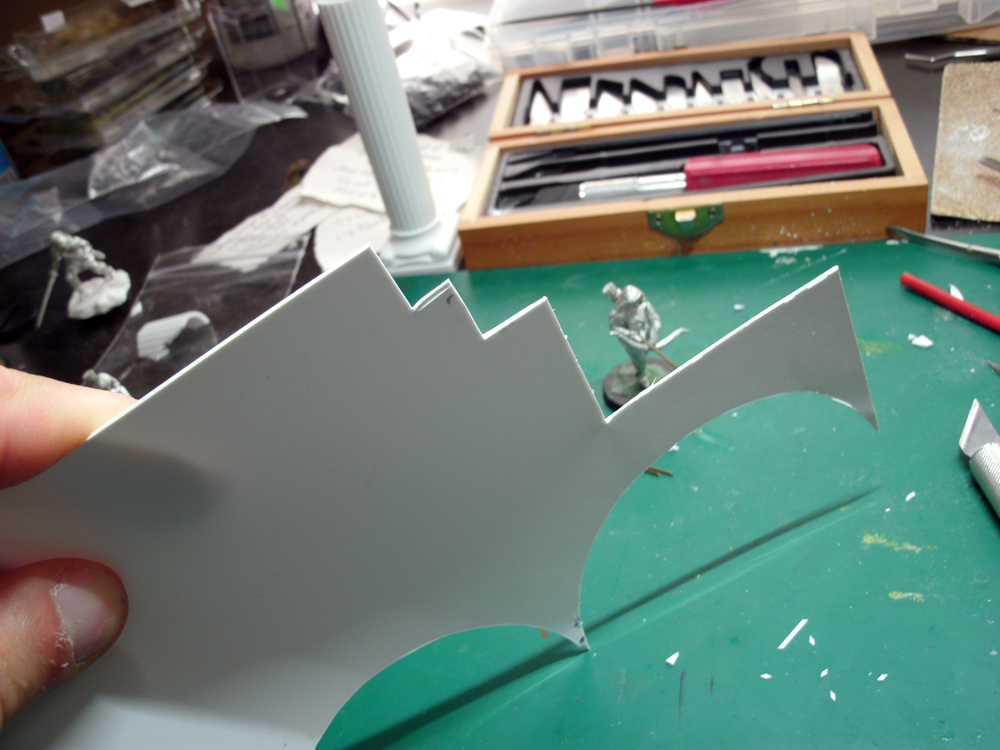
The model had a good base, so I wanted to build on that to add bulk to its shoulders and broaden the model as a whole (it was an early sculpt for the range and is slimmer than the newer models). First up was the shield, a piece I wanted to use to broaden the mini. I decided a raven wing crest on the shield would do this nicely and further the imagery the model is based upon.

I outlined the wing shape on a piece of medium gauge plasticard and cut it out. A quick trimming on the wing tips to take off the sharp edges and a filing to add depth to each feather and I was done.

Next up was the cloak, a trickier proposition. First off I sculpted the cloak, a process that I've detailed before here and won't trouble you, the reader, with again. Once the green stuff had dried and was shaped I started the process of creating the feathers.

Each feather on the cloak was either a line of feathers like the one seen in the middle of the cloak that was cut in bulk from super-thin gauge plasticard, or like most of the feathers, cut individually and glued in place one-by-one. As you can imagine, this took most of the afternoon, but hey, no pain no gain!

To create the layered effect, I started at the bottom of the cloak and glued in place successive rows of feathers, interspersing row cut feathers with individually cut ones to save sanity. Feathers were applied with a bead of super glue on the end that would attach to the cloak and applied with the delicate use of a pair of tweezers. Some feathers were bent up or down to give a nice flow to the cloak.


And we're almost done! Now all I have to do is attach the cloak to the model and add some finishing touches.

Here it is, two clasps married the cloak to the model and a thin brocade lined the top of the cloak to cover the tips of those feathers at the neck.


The final addition was made to the helmet, a bit of green stuffing to create a nose guard. The nose guard added bulk to the head and emphasize an avian "beaky" appearance.

Next up I had three Grular Lifetakers on my desk in need of some customization. These are cool models with a lot of potential, they're posed as if stalking their prey with bow down at the ready.

To my mind, the only thing they're missing is a knocked arrow. Let's take a look at how to make one in three easy steps!

Start off creating your arrows by cutting lengths of any suitably sized rod material to be their shafts. I looked at paper clips before deciding on fine brass pinning rods (the paper clips were a hair too thick). To reference the length needed for each shaft I flipped a Lifetaker model over and held the pinning rod up next to her arrow quiver.

Next we need to add fletching to our arrows. To do this I revisited the same super-thin gauge plasticard I used to create the feathers for the questing knight's cloak. As seen above the thickness is comparable to a piece of printer paper.

I cut a thin line from the plasticard with tapered ends to create a super long parallelogram. Yes, I haven't said the word parallelogram since elementary school, it's bringing back some fond childhood memories.

From that long strip I cut the individual sets of fletching that would sit on the proximal (closest to the model) end of the arrow shaft.
The final piece needed to complete the arrow is the arrowhead. To make an arrowhead I took medium gauge plasticard (seen above) and cut out a small triangle.


Once the arrowhead was glued to the arrow shaft I then trimmed it to get a more refined shape. This is a lot easier than trying to cut such a tiny piece in your hands.

The end result! Two of the Lifetakers have arrows knocked and the third is still in the waiting. A final addition of a hair-string to the bow after painting will finish the model!

Now, time for the promised sneak peek at the new DGS Freeblades miniatures! These are two models I'm especially excited for, not only because they are excellently sculpted, but because I will be the first to put paint to model on them!
Ok, here they are..


Yes, yes I know, they're not the whole model, but that will come later closer to their release!
Join me next time to check out what's on my desk and what new creations I'm working on at the Monster Lab!

No comments:
Post a Comment