
I've got two cool minis to show to you this week. One of them I'm especially excited for because it's a conversion done for an unreleased model, the Questing Knight of Barek.
 |
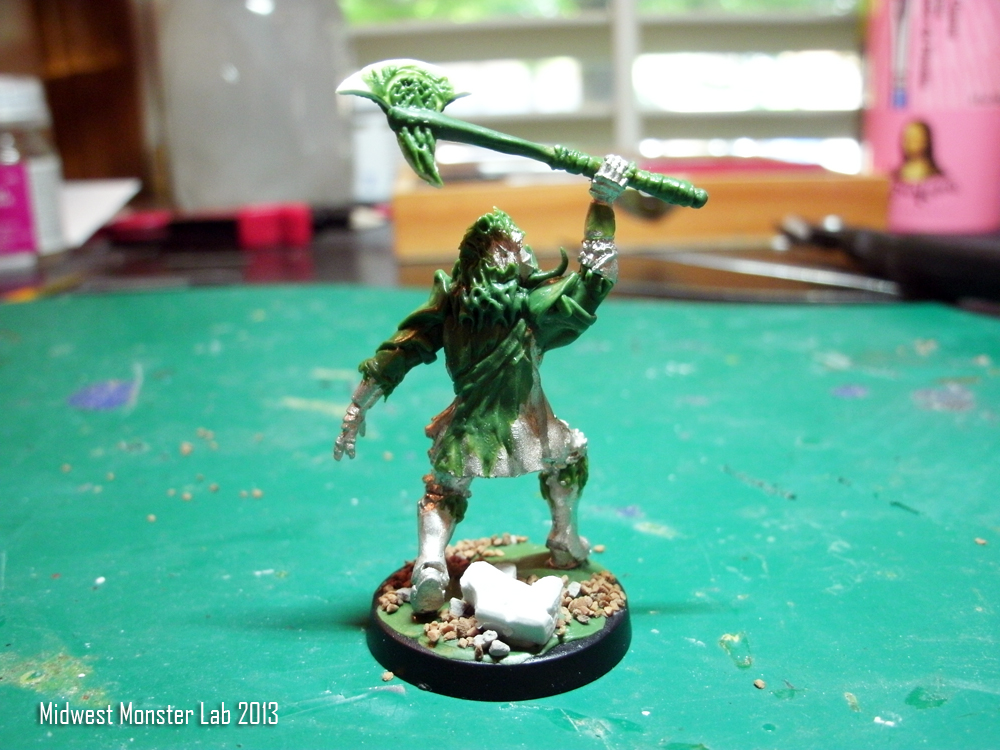
| Questing Knight of Barek |
 |
| Questing Knight of Vidnuar |
 |
| Questing Knight of Tahnar |

The QKoV is an awesome model and I knew it would be an excellent base for my Barek conversion. After removing both arms and his sword, I used three brass pins to create the foundation for his new arm positioning and axe.

I also slightly repositioned his legs and head, giving him less of a stalking look in favor of a striding posture. A bit of foundation on his arms and I was ready to add the bulk of my new arm sculpt.

The QKoB got a padded under-tunic and some crab shell shoulder plates to represent his extra heavy armor of 7. I also wanted his helmet to be very unique and stand out as a true representation of the boar, so I beefed up his face plate and added a couple of tusks.

The axe got some more fleshing-out with an embellishment on its hilt and a leather grip. Boars are known for their unruly mohawks and I wanted this knight of Barek to have a similar look. A bit of green stuff hair did the trick.

The axe received a bit more 'stuff on its blade, giving it some relief designs, and then the model was done!


This was a really rewarding project and one that was greatly appreciated by its commissioner, Jon C; and a great chance to keep working on my modeling skills. I'll be doing a custom sculpt for the Falkaaran Fire Wizard for entry into the sculpt and paint category at this year's GenCon, so I need to be on my A-game!

The last model I have this week is the Falkaaran Witchcat. After winning a free paint job for his Fire Wizard by answering a trivia question correctly, Jason C decided to have me do the whole lot of them for him. Which reminds me... there's still an unanswered trivia question from last week's post (look down by the pictures of the spirit warrior and thug)! Answer it correctly and I'll paint up an infantry sized mini for you for free!
Until the Falkaaran kickstarter finishes, there's only two members of the freeband released and the witchcat is the final one for me to do. (I am really excited to paint the rest of the band, check out the pics of the models on the KS site!)

The witchcat isn't your everyday predator, he has very real psychic potential! This is represented in-game by his ability to cancel the "spirit" talent some models may have (think spirit warrior) and outside the game by its ability to communicate telepathically! Really cool stuff, and something I wanted to depict on the model for sure. To do this I decided a pair of creepy glowing eyes would do nicely.

The witchcat also has very faint panther spotting on his legs and haunches.. this isn't an official look for the cat and you can paint yours any way you see fit!
That's it for this week, stop by next time and see what else I'm working on here at the Monster Lab!
Good gaming and happy hobbying!


