
A good couple of weeks of construction has gone into our display board at this point, and now is a perfect time to step back and get some perspective before we move on. Let's revisit the very first schematic I made for my demon display board a few months back.
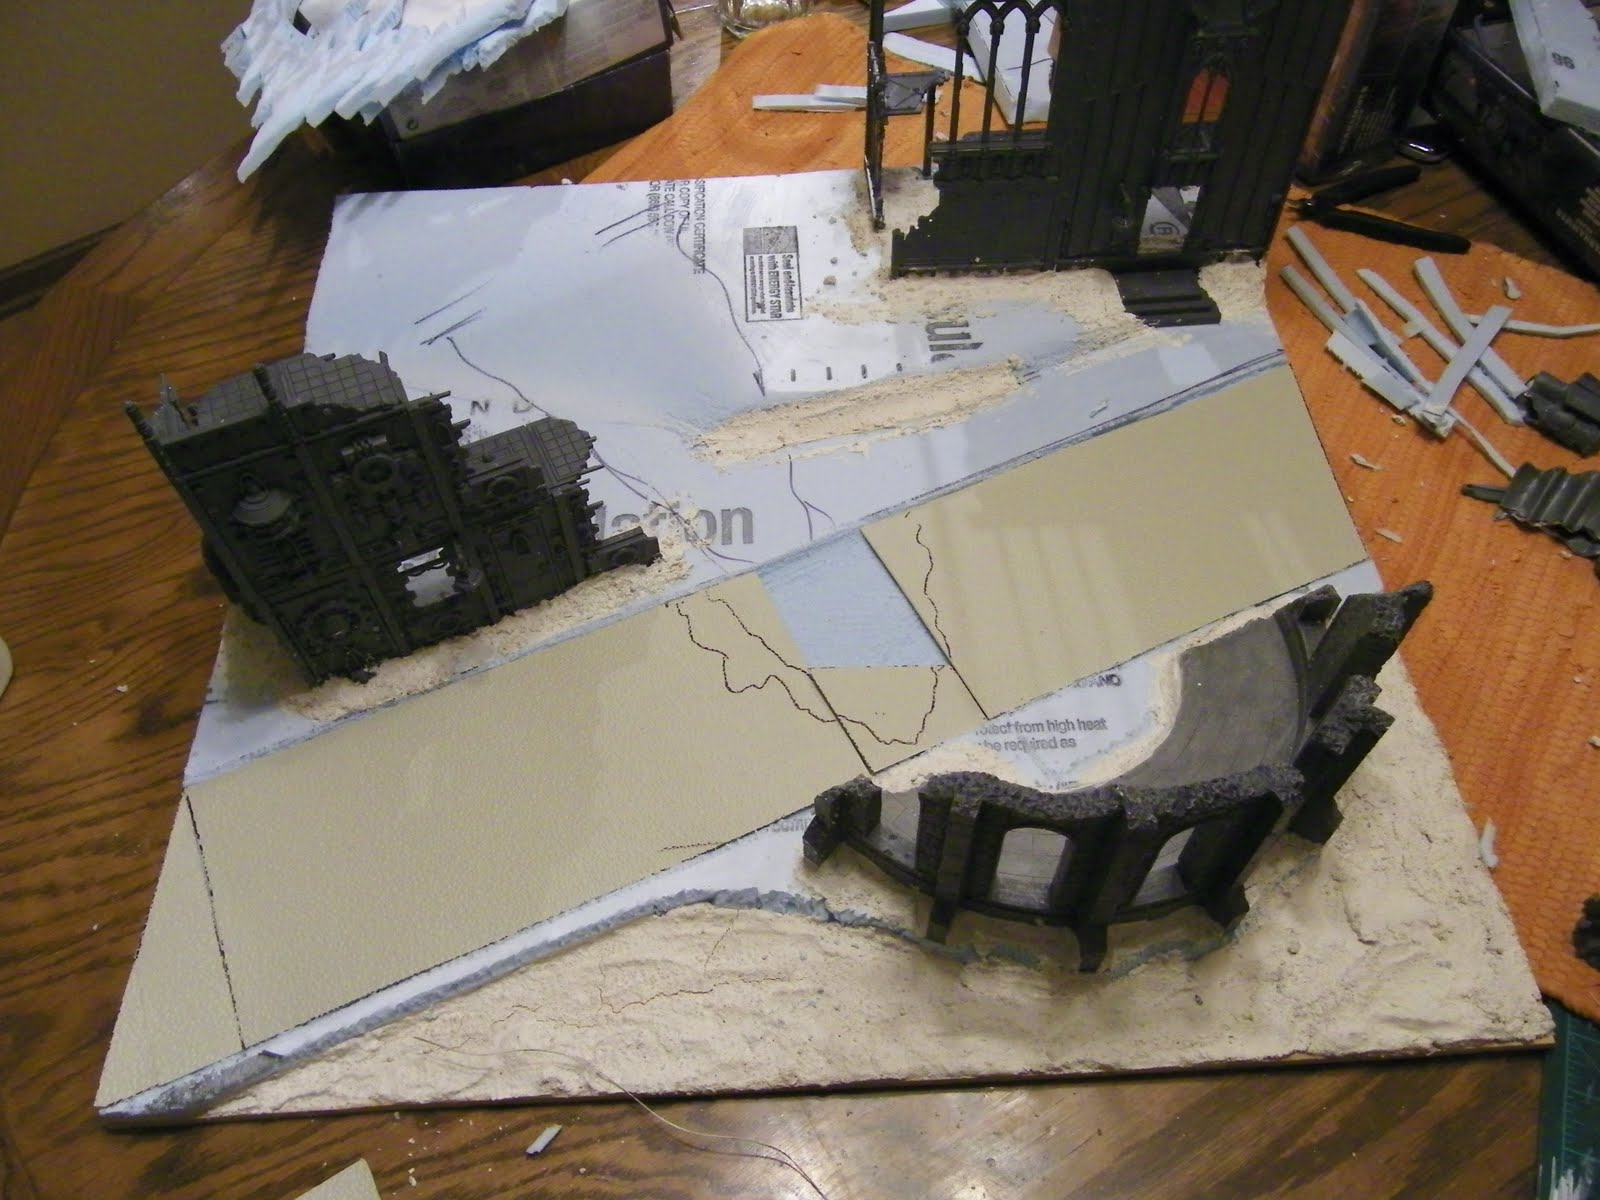
As you can see, my grandiose ideas for the board have been altered somewhat. I've pared the buildings down from seven to 2 1/2 (one is merely a flanking facade for a statue), and the general layout has been compressed. This is what I mean when I refer to "letting the board tell you what works." I was a bit off in my estimates for the scale, and when reality set in during construction, I simply altered my plans and went with the flow. Remember, this is a good thing! Let realism assert itself in the construction of your piece, things that should work, will, and those that don't, won't.
That being said, step back and take a look at your display board, and then at the initial schematics you wrote up. Now that construction of your piece is well under way, a little more planning will help determining how you should proceed. Looking at my piece, I have a good foundation, but there is something missing. At this point in construction I don't know what it is yet, but I will soon find out! How do I know this? Because the piece will tell me, it won't look right until it is complete. Don't get frustrated if your piece isn't looking quite the part yet, there's still plenty of time to figure things out.

With the main buildings in place and the road marked off, I'm ready to proceed. However, two main features are still not present on the board: the warp gate and the fallen statue. We'll get to those in a bit.
As for the materials we'll need this week:
1. Felt-tipped marker
2. Styrene sheet roadway (more info below)
3. Wire brush
5. Box cutter
6. Glue applicator (can be as simple as a flat piece of extra foam board or a sturdy paint brush)
10. Hydrocal Plaster

As a general rule, get all your foundational components onto the board first. In my case, this leaves the road to be completed. I'm using Plastruct's cobblestone (product code PS-74) for the pavement of my roadway. One package of the cobblestone held two sheets, which was just enough for my uses (If you need more than two-feet of roadway, etc. buy more than one package).

Styrene sheet is very easy to cut and scissors are recommended for a clean straight edge. The warp gate in the north-west corner will be spilling warp energies into the city and tearing up the landscape it touches, so the road will be modeled as if its being sundered. To do this I simply marked the road with a felt-tipped marker and cut along a jagged pattern to create an uneven look of devastation.
With the road placed, mark along the edges with a felt tipped marker.

The roadway will be laid into the board within a depression. To create the depression, take your wire brush and brush parallel to the lines drawn for the borders of the road. Apply a moderate amount of pressure to remove 1/8-1/4 inch of foam.

To get an even depression, pull the brush perpendicular to your previous brush strokes. This will remove any foam left by the gaps in the bristles from the parallel stroke and create a smooth, even surface.

An appropriate roadway depression should be about 1/8 to 1/4 inch in depth.

The roadway should now fit snugly into the depression we've made, if not, simply trim the edge of the styrene that doesn't fit. It is recommended that excess roadway styrene is trimmed because once too much foam board is removed, it is difficult to put back! A curb will be fixed on the border of the roadway, and this will smooth the transition from the road to the surrounding terrain, as well as covering up any uneveness in the roadway cut.

Apply a liberal amount of glue to the roadbed and push the styrene cobbles down into the glue. There really isn't such a thing as too much glue here!

Use an applicator to distribute the glue evenly.


With the roadway set, let it dry overnight. When working with products that require a dry time, its good to have a general plan as to how you will proceed. Following this step-by-step, you might notice I work in stages, moving on to another facet of the project as one piece dries. So, while the road dries, let's move on to the statue feature.

For my display I selected Games Workshop's space marine statue from their Honoured Imperium set.

The statue will be in a state of disarray, literally crumbling to the ground!

To do this, assemble the statue without gluing it, and then take a felt tipped marker and draw where it will be broken.

The plastic for the statue is incredibly tough stuff, it is recommended that ONLY high gauge blades are used to cut it. Even still, cutting directly along the line will be difficult. What I did was score alone the line and drive my blade through at specific areas in the break. The areas I pushed my blade through was where the direction of the break would change (I didn't want a straight line across each broken segment, but a natural jagged crack). With these marks made I cut at each end of the line (beginning and end) with my sprue cutters and then bent the model until it broke along the score line.

While working, be sure to keep all pieces near to those they were cut from. It may not seem like it, but when all the cutting is done, some pieces are relatively difficult to remember where they go. (There was a small piece that plagued me to no end, until I finally discovered that it attached up under the torso and out of sight)

If all goes well you should end up with segments that look like these.

Now that all the statue's fragments are cut, glue them together. When the glue's dry apply a moderate amount of plaster (Mold-A-Scene) into the open spaces left by the cutting. I applied a rather liberal amount knowing that later I could cut off any unwanted excess.

Let the plaster dry for 24 hours.

Now that time has elapsed and our glue/plaster has dried we can continue construction.

To create convincing piles of rubble, first apply a moderate "base layer" amount of plaster to areas where rubble piles will collect. I decided these areas would be inside the ruins of buildings (theirs roofs and walls collapsing in) and areas radiating out from said ruins (as the warp gate exploded into existence it sheared off parts of the buildings).


Heap the plaster into little mounds and drag out the edges of outlying mounds to taper them into the terrain. This will give the rubble a natural distribution, as most rubble will collect in highest concentrations closest to where it was rent.

This the a moment I referred to earlier, where I said the board was speaking to me, telling me something was missing. The feeling I got was that the buildings felt bare. Reaching into my bitz box I took out some extra embellishments from the Imperial Sector boxed set and put them to good use on the statue facade and the shrine to the Aquila. I also got my hands on some Dark Angels bitz (scrolls and books) and put a few on the facade and shrine as well. What I was going for was a gothic feel, lots of heraldry and excess architectural embellishment.

I also took some buttresses from the sector box set and applied them to the sides of the shrine. This little addition did a lot to bulk out the building and give it more the appearance of a cathedral.

Street lights from the sector box set are a small touch that go a long way to tie the road in with its surroundings.


Earlier we put down a base layer for our rubble piles. Giving them 30 minutes to an hour to dry will be enough to begin adding a detail layer on top of them. I took pieces from the sector box and cut them up placing them at angles on top of the base layer. To hold them in place I applied a small amount of all purpose glue. This isn't meant to be a permanent fix, but will hold the pieces in place until we put another layer of plaster on them.

For the statue facade rubble I used some plaster cast blocks made by buddy Joe Suber at his shop, 31st Century Games and Hobbies. If plaster cast materials are on hand it's a real plus. To break up the blocks I put them in a plastic bag and beat the bag on the sidewalk outside the shop.


The upside down cathedral window is from the Honoured Imperium boxed set and is an exact match with the windows for the Shrine to the Aquila.

I chose to put most of the architectural rubble near the walls of the buildings where they would naturally be found. For instance, broken walkways were in disarray where they would have crashed to the ground under existing catwalks. Minor rubble inside the building itself consisted of simple gravel rocks.

To create the warp energies that would be flowing along the ground from the warp gate I used Woodland Scenic's Lightweight Hydrocal. To get the right consistency, not too runny that it will hold shape, mix water until a malleable paste forms. Spread the hydrocal on with any applicator you desire. I used a spoon and made swishes in the plaster to create a wavy effect to emulate fluid warp energies.

Now the gap we made in the road really comes into play, as the warp energies appear to be tearing through it. To further the effect, apply mold-a-scene plaster to the edge of the tear in the roadway, radiating out. I placed a line of plaster on the border of the broken road and pushed it with a plastic spoon so that it fell onto the roadway itself.
At this point we have also put a curb on our road. I used a strip of simple styrene plasticard. Most anything that can hold a straight line will do.

With the spilling warp energies in place, we can finish adding rubble to the board. Once again I applied mold-a-scene plaster, but this time in areas surrounding the buildings. Taking into consideration the warp energies and the direction they would cast lighter particles of rubble, I put plaster in areas where fragments would have been blown off the buildings. Use the dab and scoop method with a spoon as described above to make the rubble look suitably strewn.
This is also an excellent opportunity to tidy up any cracks left in your road or anywhere else. The cracks in the road in the south-west corner were covered up by debris knocked off of the mechanicum building.
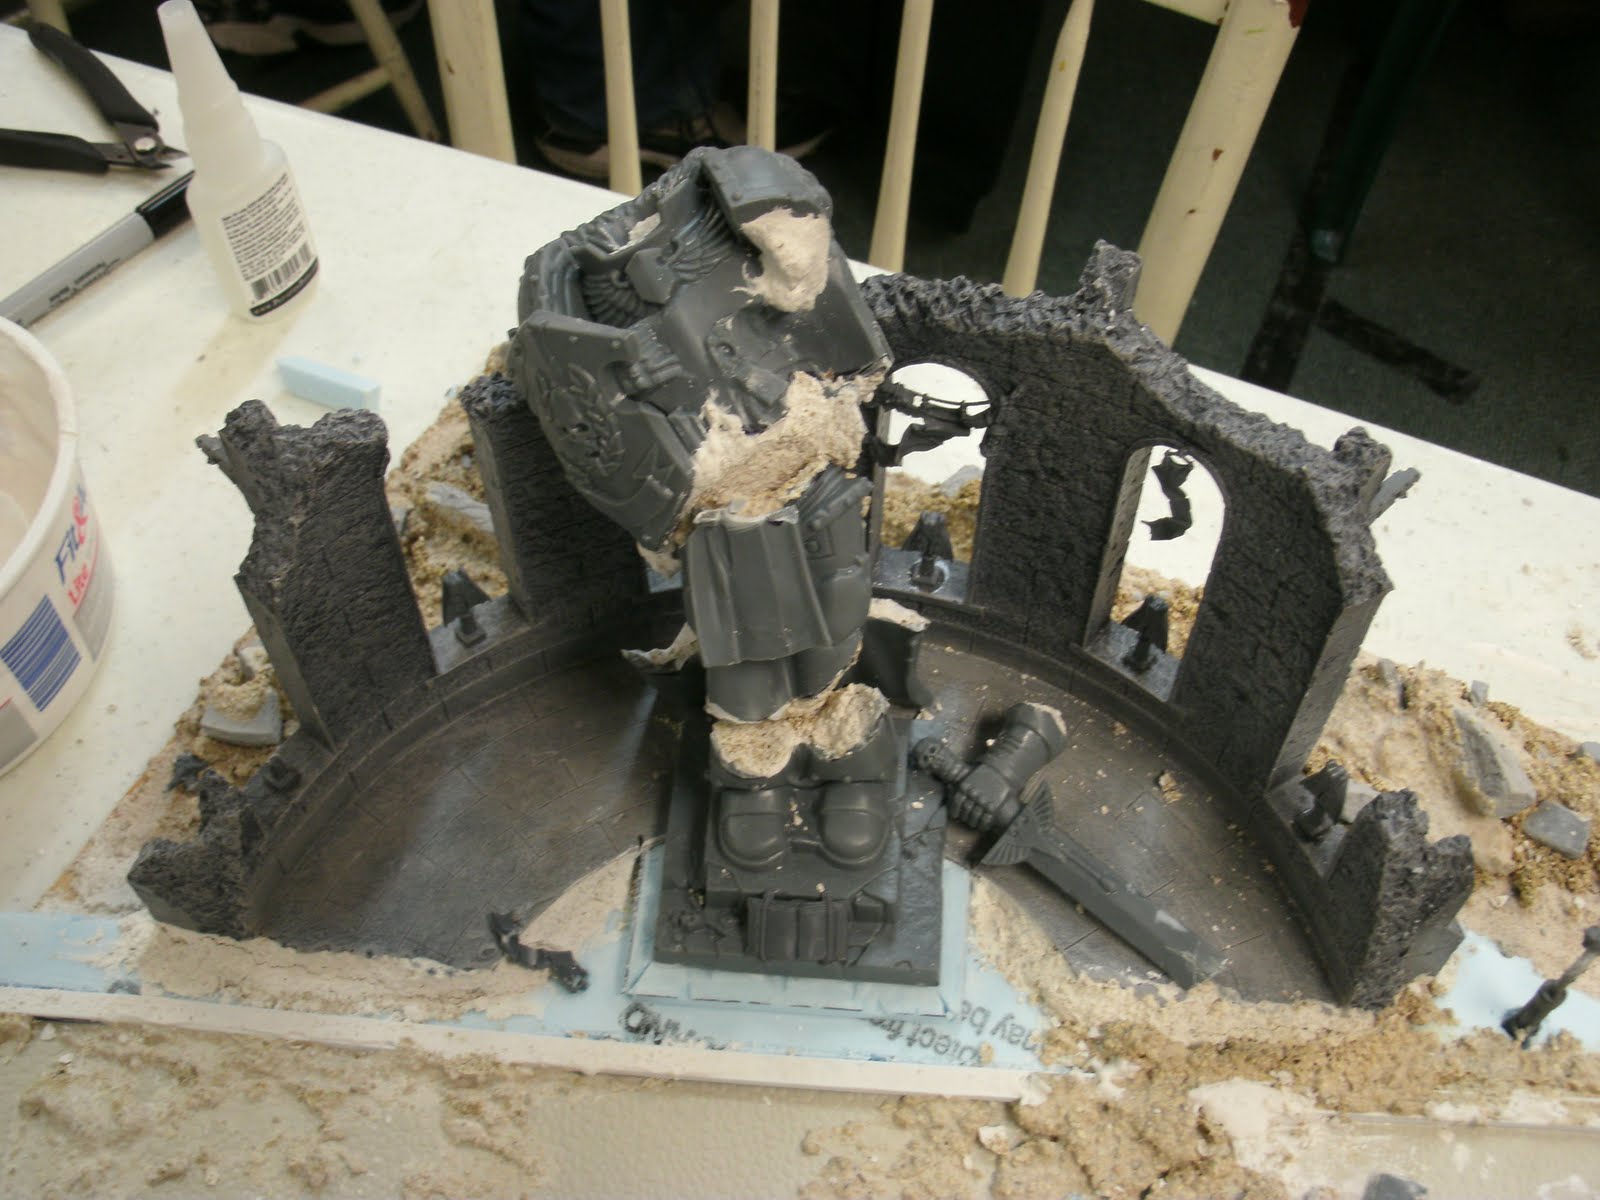
One of the coolest features on the board is the broken space marine statue. I carved off excess plaster to make the pieces fit together and positioned them like the statue had born the brunt of the warp rift's explosion into reality and was knocked back into the facade flanking it. I like to think that either knowingly or otherwise, the warp energies were projecting into real space at just the right angle to fell the statue..


The head was even decapitated by the force of the fall.

To finish the piles of rubble we have been working on, apply a watered down layer of mold-a-scene plaster over to the top of the rubble and around it.

Doing so the pieces of rubble will stick out, but still look suitably buried.


We're getting very close to finished with construction, but a lot of final touches remain before paint hits the display. The warp gate is still to go, and a special surprise to do with the warp energies.. stay tuned!
Wow, very detailed tutorial. This will look fantastic when it is finished.
ReplyDeleteI appreciate that, it's been a really fun project. Each model in my demons army will have an assigned slot on the board and their basing will be made to match.. that's the master plan for next week!
ReplyDeleteIncredible work and a brilliant tutorial - definitely looking forward to seeing how this turns out. Keep up the great work!
ReplyDelete